Planning a trip to India from the U.S.? You’re not alone. Thousands of travelers eagerly apply for an Indian e-visa every month to experience India’s rich culture, stunning landscapes, and vibrant festivals. However, delays and rejections in the e-visa process can disrupt your plans, cost you money, and add unnecessary stress.
To ensure a smooth, stress-free application process, it’s wise to use professional assistance like LetMeHelpYou’s Indian E-Visa Services from the USA. Their support can help you avoid common errors, ensuring your application is processed efficiently. Before applying, it’s essential to understand the Indian e-visa requirements, processing times, and document checks to prevent delays and last-minute panics.
Below is a comprehensive guide packed with practical, actionable tips to help you avoid delays and ensure a hassle-free Indian e-visa application from the U.S.:
1️⃣ . Understand Indian E-Visa Eligibility and Types
Before you start your application:
-
Check your eligibility: U.S. citizens are eligible for Indian e-visas for tourism, business, and medical purposes.
-
Choose the correct visa type: Don’t mistakenly apply for a tourist e-visa if your trip involves attending business meetings.
-
Duration and entry: E-visas typically allow double-entry or multiple-entry for 30 days to 5 years, depending on the type.
Tip: Double-check your travel dates and purpose to match them with the correct visa type to avoid rejections or entry issues.
2️⃣ . Prepare Your Documents in Advance
Having accurate documents ready can significantly reduce processing delays. You will need:
-
A valid U.S. passport with at least 6 months’ validity from the date of arrival in India.
-
A clear scanned copy of your passport’s bio page (PDF, under 300KB).
-
A recent passport-size photo with a white background (JPEG, under 1MB).
-
A confirmed travel itinerary (flights, accommodation details).
-
For business visas, a business card and an invitation letter from the Indian company.
Common mistake: Uploading blurry or incorrectly sized photos and passport scans can delay your application or cause rejection.
3️⃣ Apply Early to Avoid Last-Minute Rush
While Indian e-visas are typically processed within 3-5 business days, delays can occur during peak travel seasons. Apply at least 2-3 weeks before your departure date to avoid stress if additional documents are requested or clarifications are needed.
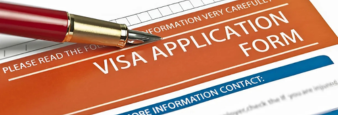
4️⃣ Fill Out the Application Carefully
The Indian e-visa application form requires:
-
Accurate personal details matching your passport.
-
Travel details including entry and exit points in India.
-
An upload of your photo and passport scan in the correct format.
Double-check for:
✅ Correct spelling of names.
✅ Accurate passport number.
✅ Matching date of birth and place of birth.
✅ No typos in your email address (as e-visa approval is sent via email).
Errors in these sections can delay your e-visa or cause it to be rejected.
5️⃣ Pay Attention to Payment and Confirmation
After submitting your application:
-
Pay the correct visa fee using a reliable payment method.
-
Ensure your card allows international transactions.
-
Save the payment confirmation and application ID for tracking.
Tip: Payment failures are a common cause of incomplete applications. Always check your email for confirmation, and contact the support team if you do not receive payment acknowledgment.
6️⃣ Monitor Application Status
After submission, use your application ID to track your Indian e-visa status online. This helps you:
✅ Check if any additional documents are needed.
✅ Download your e-visa approval letter once processed.
✅ Avoid surprises at the airport.
Note: Print a copy of your e-visa approval and carry it during your travel. Some airlines may require it during check-in.
7️⃣ Seek Professional Assistance if Needed
Using a professional service like LetMeHelpYou’s Indian E-Visa Services from the USA can save you time, reduce stress, and increase your approval chances. They handle:
✅ Form completion and error checks.
✅ Document verification and formatting.
✅ Updates on processing status.
✅ Prompt handling of payment and system errors.
This is particularly helpful if you are a senior traveler, traveling with family, or on a tight schedule.
8️⃣ Be Aware of Entry and Stay Regulations
Once your e-visa is approved, ensure you:
✅ Enter India through the authorized airports or seaports (like Delhi, Mumbai, Bengaluru, Chennai, etc.).
✅ Respect the maximum stay permitted under your visa type.
✅ Have your passport and printed e-visa ready for immigration clearance.
9️⃣ Watch Out for Common Mistakes
Avoid these mistakes to prevent delays:
❌ Using a photo with shadows or unclear backgrounds.
❌ Applying with a passport that will expire within 6 months.
❌ Booking flights before visa approval without flexible cancellation options.
❌ Not checking your spam folder for visa approval emails.
❌ Providing inconsistent travel dates between your application and your itinerary.
10️⃣ Plan Travel Insurance and Health Requirements
While not mandatory for the e-visa application, travel insurance covering medical emergencies is highly recommended. Additionally, check India’s latest vaccination or health entry requirements before your departure.
Conclusion
A smooth Indian e-visa application from the U.S. is entirely achievable with preparation and careful attention to detail. By using professional support, double-checking your documents, and applying in advance, you can avoid unnecessary delays and focus on enjoying your trip to India’s vibrant cities, heritage sites, and spiritual experiences.
Are you planning your Indian trip soon? What part of the e-visa process do you find most confusing, and how can we guide you further? Share your questions below, and let’s make your India travel stress-free!